The process of making this cloisonné enamel pendant is not quite as bad as the title of this post suggests, although it did take many hours of work!
I was inspired by a photo from a gardening magazine (another of my many hobbies) which showed a bunch of juicy grapes in the most luscious purples, pinks and greens, and my mind immediately said 'enamels'.
The first thing I did was make a sketch of the piece I wanted to make. I really like off-centre shield shapes (like an off-centre triangle) and I thought this would enhance the grape design. Although I knew what colours to use for the grapes, I was less sure about the background colours so you can see that I made several drawings (below). In the end I wanted the overall feel to be bright, juicy and tropical, so I went with reds and pinks.
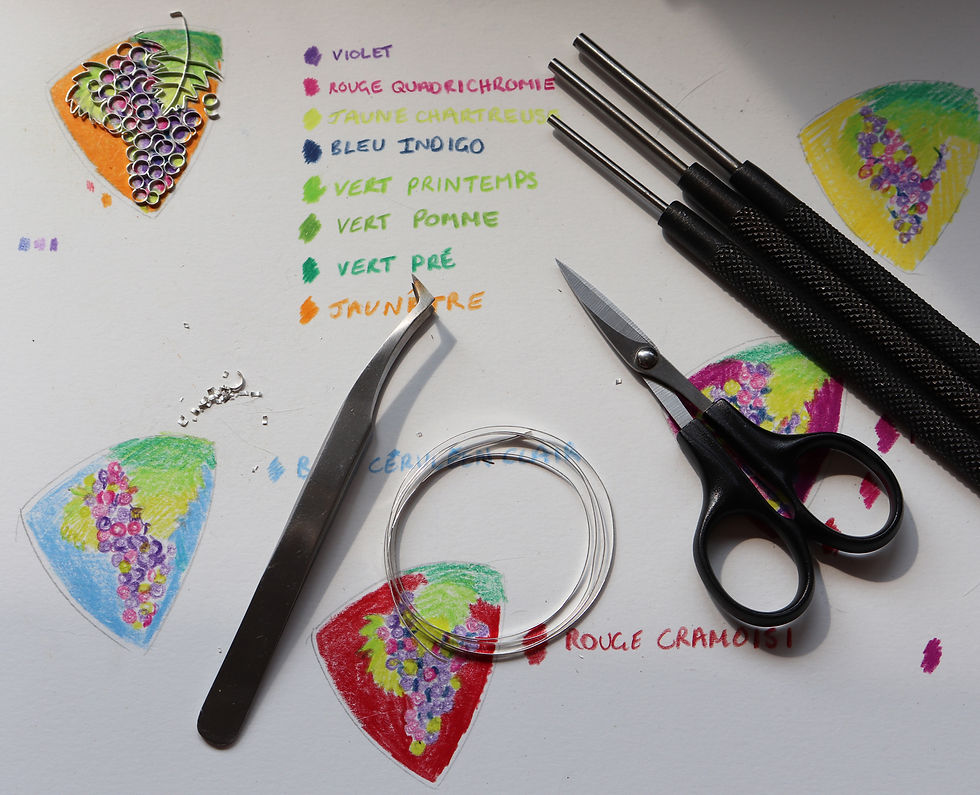
The cloisonné wire, which is fine silver 1mm x 0.2mm, took a lot of concentration and many hours to bend. I used pin punches to wrap the wire around and manipulated them into shape with my fingers. The leaves were bent with metal tweezers. Bending wires and placing them on the base for firing can be quite infuriating sometimes - if you move one wire another moves and you're constantly having to shift them, but the end result is always worth it!
The base was created from copper and over a period of several firings I built up three layers of Soyer copper flux on the back and one layer on the front, followed by a layer of fused fine silver foil. Then I wet-packed a layer of Soyer silver flux on the front and used my tweezers to place each wire carefully into the flux. The water tension helps to keep the wires in place a little better as you are working, although I dried the piece off in front of the kiln before firing.
I think it's important to try and get as many wires as possible into your first layer of flux, although there were a few straight wires on the leaf in the top right hand corner that I had to fire separately. Straight wires have a habit of falling over so sometimes you have to find a way to put a bend in them to keep them upright,
After all the wires were fused I had a great time filling in all the colours of the grapes (below). Check the temperatures your colours fire best at and fire the 'hot' ones first. I left the background colours until last because they like to be fired at a lower temperature. Saying that, I do try to fire as many colours as I can at a time, but often I leave the small crevices until the last, like the opaque blue between the grapes. Other colours can get contaminated easily by any overspill when you are trying to pack glass grains into tiny spaces, so think carefully about the order you will use your colours. Of course sometimes I forget my own advice!

I wet-packed another layer of silver flux on the background because the pinks and reds I wanted to use can be silver-sensitive. I will say that I am still searching for a pillar-box red transparent enamel that works over silver (even over a layer of flux over silver), because I don't think at present one exists. If you know of one please let me know!
Everyone asks what colours I used for the background because they are so lush: I used Nihon Shippo Coral Red G709 around the edge and G702A Pale Magenta Pink towards the centre and made sure I didn't over-fire, which is another thing the reds and pinks don't like. I was pleased and relieved that the colours came out really lovely.

As well as a sketchbook for my initial designs, I also have a 'workbook' where I make notes of the layers I have added and what colours I have used so I can replicate the colours in the future if necessary. I can guarantee you will not remember all the colours you have used 6 months down the line!
After grinding the enamel back down to the cloisonné wires by hand with a carborundum stone, I then went through many grades of sand paper over the piece before polishing with Luxi White to shine the silver wires. I then used a glass brush to get rid of any traces of polish and refired for a final time to bring back the gloss to the glass. I would like to add that I am not yet an expert on polishing! I definitely wouldn't use rouge or a coloured polish because the polish can be pushed into any crevice there may be and I'm not sure how it could be removed - an ultrasonic cleaner perhaps?
I domed this piece initially which gives the copper added strength, but the curve has become more pronounced over repeated firings which is going to make it 'interesting' to set in sterling silver to say the least. I'm actually going for a lesson with a local silversmith to help me with some soldering work so hopefully we will come up with something between us! I will let you know the results.
Until next time.
Kelly x
Comments